How many EPiServer sites have you built that don’t contain a custom property? For me, the answer is none! All EPiServer sites that I have built contain some sort of custom property, ranging from simple drop-down lists to more advanced dialog-based properties. The main reason I build custom properties is to make content editing simpler for the user, and also to integrate information from other systems.
One of the first projects I worked on had a requirement to provide editors with the ability to select a content owner through a series lists, populated from Active Directory. I figured I would meet this requirement by creating a custom property with a series of drop-down lists, which filter each other as selections are made – a common approach in web application development.
So, not having much experience with EPiServer properties, my first reaction was to apply the standard ASP.NET approach for this requirement: set AutoPostBack to true and filter the drop-down lists each time the selection changed. My first problem was that I tried to do the PostBack in the custom property – big mistake! There are two reasons not to do this, and it’s not because you can’t! Reason one is that the user will be asked if they are sure they want to navigate away from the page; this will confuse them. The second reason is that validation will occur and all incomplete required fields will fail validation, displaying errors to the user. Sound familiar to anyone?
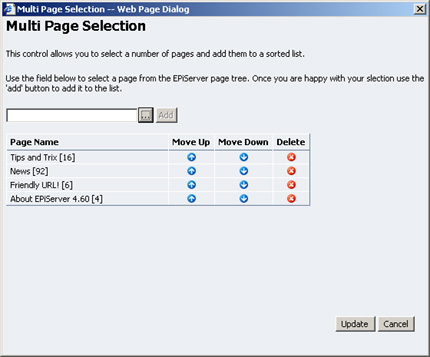
After learning from this mistake, I decided to follow the standard EPiServer way of doing advanced properties, and implemented a popup dialog. This was great as it allowed me to meet the requirement using standard ASP.NET development techniques, and all I had to do was pass the resulting selection back to the property using JavaScript.
Now this approach is fine but, in my opinion, too many popup dialogs do not create a very good user experience. So, how do we create these advanced properties and not use popups? The answer: use AJAX and, to make things easier, use the Atlas framework.
For this article I decided I would re-create the content owner selection property, but using the Atlas framework and Atlas Control Toolkit. The content owner property consists of three drop-down lists for branch, business unit and content owner. When a branch is selected, the list of business units gets populated and enabled, and the same for business unit to content owner.
Now, would you believe me when I say that I only needed to write one line of JavaScript to get this working? No? Well I did, but all thanks to the Atlas Control Toolkit and the CascadingDropDown control. The CascadingDropDown uses the Atlas extender to provide AJAX functionality to the standard ASP.NET DropDownList. Through configuration properties the CascadingDropDown can be set to auto-populate from a web service, with the options filtered based on the selection from a dependent DropDownList.
Incorporating Atlas into your property is a fairly straight forward process. The first thing you will need to do is download the Atlas framework, and the Atlas Control Toolkit if you intend to use some of the pre-baked controls. The next thing you will need to do is set up your project. I tend to create my properties in separate projects so they can be easily reused and distributed (read this
article by Steve Celius for more information on this). Here are the steps I followed to create my custom property with Atlas:
- Add a reference to the latest EPiServer.dll assembly (which needs to run under the .NET 2.0 framework).
- Add a reference to the Microsoft.Web.Atlas.dll assembly (which can be found at “C:\Program Files\Microsoft ASP.NET\Atlas\v2.0.50727\Atlas” in a default installation).
- Add a reference to the AtlasControlToolkit.dll and Microsoft.AtlasControlExtender.dll assemblies if you intend to use the pre-baked controls.
- Add a new Class to your project and set it up the same way you would for all custom properties (inherit from one of the base types, add the PageDefinitionTypePlugIn keyword and override CreateChildControls).
- In the CreateChildControls method, add your standard controls, add a ScriptManager, add an UpdatePanel, then add and configure your Atlas controls as appropriate.
- Create an ASP.NET web service with a single method that can be called by the Atlas client script. The method you create will depend on the controls you are using and the type of information being displayed.
- Build and deploy your assembly, web service and supporting assemblies.
- When you add your property to an EPiServer site you will need to add the necessary web.config settings. These can be found in the sample web.config file installed with Atlas (same location as the Atlas assembly location mentioned above).
So that’s it; it’s not that hard really, and is made a lot easier with the Atlas Control Toolkit. If you want to download my sample properties (dialog and Atlas versions), then download them directly from
my Box.net account.
Tips and tricksAlways check for an existing ScriptManager as you can only have one registered on a page. When adding the ScriptManger, try something like this:
ScriptManager propertyScriptManager = ScriptManager.GetCurrent(container.Page);
if (propertyScriptManager == null)
{
propertyScriptManager = new ScriptManager();
container.Controls.Add(propertyScriptManager);
}
Don’t enable partial rendering on the ScriptManager as this will cause JavaScript errors such as, "return statement outside of function" or the classic message, "Unknown error".
Add runat="server" to the head tag on the EditPanel.aspx page as this is required by the Atlas framework. Be careful though, as this page is an EPiServer core page, and could get overwritten next time you update EPiServer.
Use a hidden HtmlInputText control to store the property value. This control will maintain its state on PostBack even when edited with client script. You may encounter issues when using other server controls not maintaining their values on PostBack.
Useful resources and linksASP.NET Atlas official siteAtlas Control Toolkit samplesSample properties downloadEPiServer “edit in dialog property” code sample